Sunday, November 22, 2015

Jalapeño Wonton Poppers


We love the fall. A lot of things about it make us happy, but not much compares to tailgating for football games for us. We love our tailgating family! Today we're sharing a favorite tailgate food of ours! We found the idea for these here, but made a few small changes to kick 'em up a bit. Things you'll need: softened cream cheese (we use neufchatel), shredded cheddar, jalapeños, cooked (and crumbled) bacon, BBQ sauce  wonton wrappers, and oil for frying.

When I was pregnant with Isaac, he had a milk protein intolerance, so I cut out dairy for a while. Do you know how tough that is? There's dairy in so many unexpected things. I once bought beef bouillon cubes only to get home and realize that they had traces of dairy. I cried. I found that there are some really good dairy substitutes, though. This recipe was one of the things we took to a tailgate while I was dairy-free, made from those substitutes...and no one knew the difference! These days, we make them with dairy cheeses, but just know they are super easy to make dairy-free if needed! And you could leave out the bacon to make them vegetarian.

First you'll mix all your ingredients together. Add about a teaspoon of the filling to your wonton and a dab of BBQ sauce.

You want to be sure not to overfill your wontons. The one above was a little overfilled...but believe me, it did not stop us from using it!


Close the wontons like this. Try to get as much air out of them, and seal the edges with water. You don't want them to have any openings when you fry them.  Then you want to fry them in oil at 350°, turning as needed, until they are golden brown. It doesn't take long.


And then stick them in a container and take them to your tailgate! You could also freeze them at this point if needed, and then bake to re-heat.  While these are much better warm, they are pretty decent cold, too.

Ingredients:
1 package refrigerated square wonton wrappers (approximately) 
1 8-ounce package neufchatel cheese, softened
2-3 jalapeños, seeds and ribs removed, finely chopped
1/2 cup shredded cheddar cheese
4-6 pieces bacon, cooked and crumbled
BBQ sauce to taste 

Instructions:
1. Heat oil to 350°,
2. Mix cheeses, bacon, and jalapeños.
3. Place about a teaspoon of the filling onto a wonton wrapper. 
4. Put a dab of your favorite BBQ sauce onto the mixture. 
5. Fold the wonton into a triangle and seal the edges with water. Try to remove any air bubbles.
6. Place in the oil and fry until golden brown on both sides, flipping as needed.


Thursday, November 12, 2015

Making A Yeast Starter

This shows how much DME I need for my yeast stater.  (via YeastCalac)

What is a yeast starter you say?  Well, let me explain in a mini beer lesson...

When you make beer, basically you are making a big batch of "flavored sugar water" (wort).  When you add yeast to that sugar water, the yeast cells eat the sugar and ferment it into CO2 and alcohol.  The CO2 is released via the air lock and the alcohol stays in the beer.  That was fun right?

Back to why a yeast starter is good...

If you don't have viable yeast cells, they wont eat the sugar.  In turn, the wort won't ferment.  Making a yeast starter makes sure that there are enough viable yeast cells to chomp down on all those yummy sugars.

 Making a yeast starter is very simple and can be done within an hour (at most).  The photo shows the things you will need.
When making a yeast starter, you are just making a very small batch of beer.  Here I'm measuring out dried malt extract (sugar powder) to add to water.
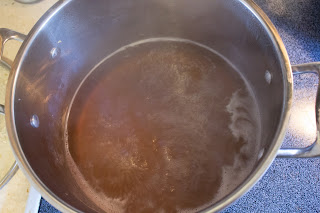
Adding water to the pot.  Bring this to a boil then add the dried malt extract.

While waiting for the water to come to a boil, I make sure to sanitize anything that is going to touch the final product.  Cleaning and sanitization is key when doing anything brewing related.

Here is the wort boiling.
I found that the sweet spot for boil time is about fifteen minutes.  Some people boil for a half hour.  That's too long for me.  I lose too much wort during the boil off and fifteen minutes still does the job just fine!

For this starter, I'm using Wyeast 1056.  It's a basic ale yeast that can be used for a wide variety of styles of beers.  IPAs, Pale Ales, etc.
After the fifteen minute boil is done, the wort goes back into the glass and needs to be cooled down to room temperature before we can add the yeast.  If you add the yeast to wort that is too hot, it kills all the yeast cells.  Not good!
I use the very scientific method of a sink full of cold water and ice to bring the wort temperature down.
Here is the yeast being added to the cooled wort.
After everything is done, it's time to put the starter on the stir-plate.

A stir-plate is basically a box with a magnetic computer fan in it.  In with the starter is a one inch stir bar that the fan spins magnetically inside the jar so it keeps the yeast cells always in suspension.

To my absolute amazement, this starter started fermenting within an hour (I've never seen that before).

I will let this run for about 36 hours then pour some off to harvest yeast (I'll make another blog post about this) and stick the remaining in the refrigerator until brew day!

Sunday, November 8, 2015

Something New!

Sarah and I try to do something meatless every Monday.  We were running out of ideas and making the same things all the time, so we needed to try something different.

Then we came across this Shakshuka recipe from Chef John over at Food Wishes.  We had never heard of Shakshuka but the recipe looked and sounded delicious, so we gave it a shot.  It's a pretty simple recipe and it doesn't take too long to make.  Most of all, everything is cooked in one pan, so clean up is a breeze.  

I really didn't miss not having a meat protein in this dish as the egg gave it enough texture to serve that purpose.  

We did find that two eggs per person was a bit much, and that one a person was perfect with some bread!  With the leftovers, we took out what ever eggs we didn't eat out and saved the pepper and onion sauce in a container and put it in the refrigerator.  It was easy to reheat in a pan and add an egg to cook for one person.  The sauce mixture would also be a good base for spaghetti or peppers and onions with a sausage.  

Shakshuka

Ingredients for 6 small portions:
2 tbsp olive oil
1 large onion, diced
large handful of sliced mushrooms
1 teaspoon salt, plus more to taste
1 cup diced red bell peppers
1 jalapeno pepper, seeded and sliced
1 teaspoon cumin
1/2 teaspoon paprika
1/2 teaspoon turmeric
1/2 teaspoon freshly ground black pepper
1/4 teaspoon cayenne
28-oz can (about 3 cups) crushed San Marzano tomatoes
1/2 cup broth, or as needed
6 large eggs (or as many as you can fit in you pan)
crumbled feta cheese and fresh parsley to finish

Instructions:
1. Heat a skillet over medium-high heat, and add olive oil.
2. Add onions and mushrooms. Season with salt, and cook for about 10 minutes, until mushrooms are golden brown and onions are translucent.
3. Add red bell peppers and jalapeno and cook for approximately 5 minutes, until the peppers begin to soften.
4. Add cumin, paprika, turmeric, black pepper, and cayenne, and cook for about a minute.
5. Add crushed tomatoes and broth, and cook for about 15 minutes. Veggies should be soft and flavors should be well-blended.
6. Check the mixture and adjust seasoning as necessary.
7. Make a well in the sauce for each egg.
8. Add one egg into each well.  Cook, covered, until the egg is done to your liking.
9. Top with feta cheese and serve with bread. 

Saturday, November 7, 2015

A Lot has Changed


Well...it's been a while.  Not just a while, a LONG while!  So, finally I have decided to brew again, and it's been way too long!  With life and kids, it gets pretty busy.  I have not stopped brewing, just haven't blogged about my brew days.  


In the year that I did not blog my brew days, I built myself a brew stand.  It makes things a quite a bit quicker and easier during the brew/clean up.  I also have been  making a lot of wine.  Wine is more convenient to make.  It doesn't take a half of a day to make, and you can do all of it indoors.  (And it keeps the wife happy.)

Now on to this recipe...

Next year, my brother-in-law is getting married and asked me to brew a beer for his wedding reception.  I have never brewed a beer for that many people, but he said to do my normal five gallons and that would be enough.  I'm going to do a five gallon corny keg and take it to the reception.  Now I need to work on getting the recipe/brewing process perfect.  

For the reception, the groom wants an American Wheat beer.  So that's what I'm trying to create.  

Now, on to the video of the brew day...